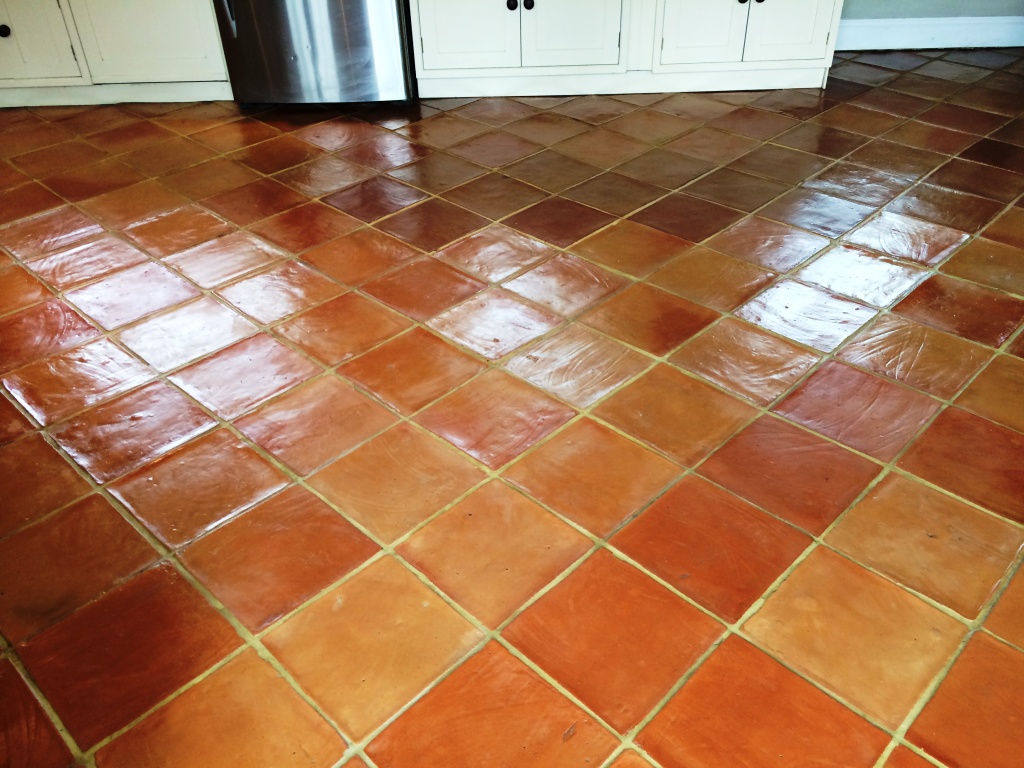
floor restoration

Original Victorian Tiles Melksham Before and After Cleaning and Sealing

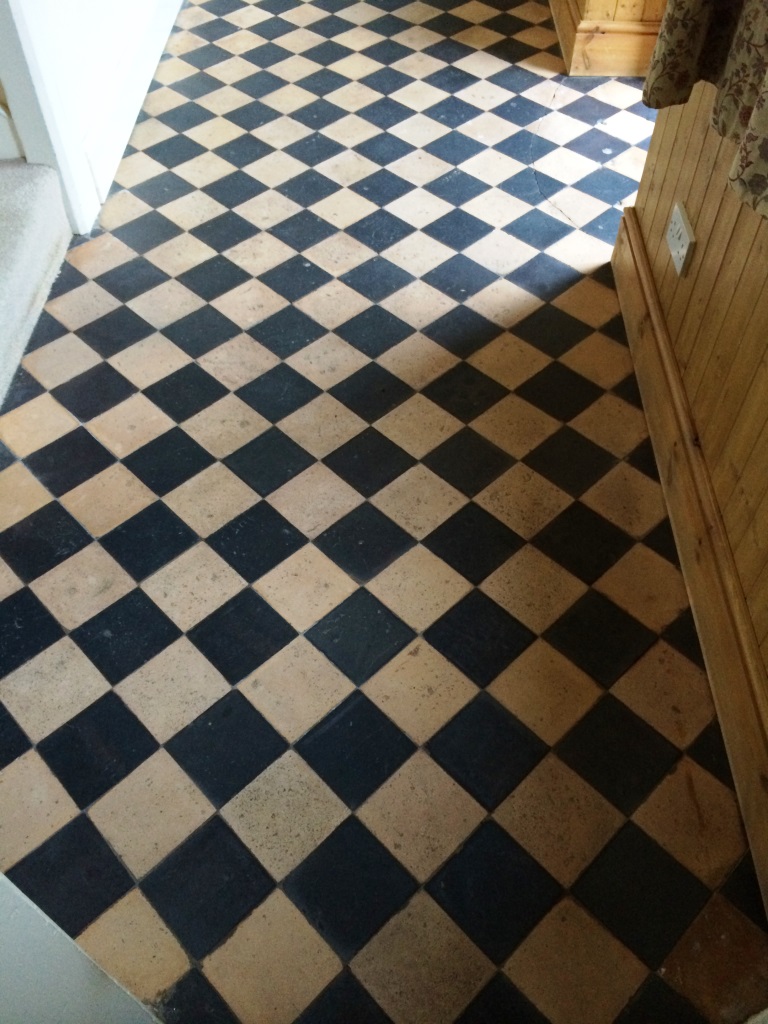
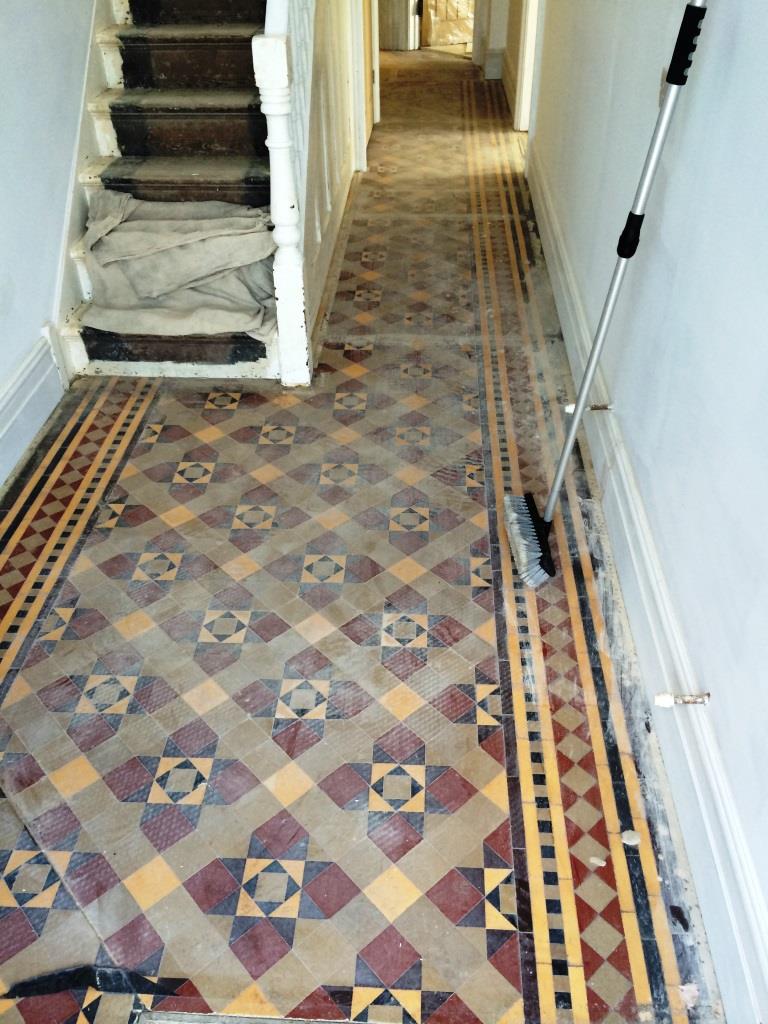
Original Victorian Tiled Hallway in Melksham

The owner of this pre 1900s period house in the town of Melksham contacted us to clean & seal their Victorian tiled hallway which had been laid in a geometric pattern and was the original floor from when the house was built. Given its age it was in excellent conditions and a real testament to Victorian engineering.

Original Victorian Tiles Melksham Before Cleaning

Cleaning Victorian Tiles

Firstly we mixed a strong solution of Tile Doctor Pro-Clean and Nano-Tech HBU remover; HBU stands for Heavy Build-Up and is a great product for getting deep stains out of tiled floors. The tiles were covered with the solution and left for twenty minutes so it could soak into the pores. We then attached a black pad to a rotary machine and scrubbed the area thoroughly. Any paint or adhesives was then removed using a scraper and once we were satisfied we then removed the slurry using a wet vacuum and rinsed several times with cold clean water and a deck brush to ensure we had removed all traces of cleaning product before sealing. Stubborn areas were re-treated and the process took most of the day so we then left the floor to dry overnight.

Sealing Victorian Tiles

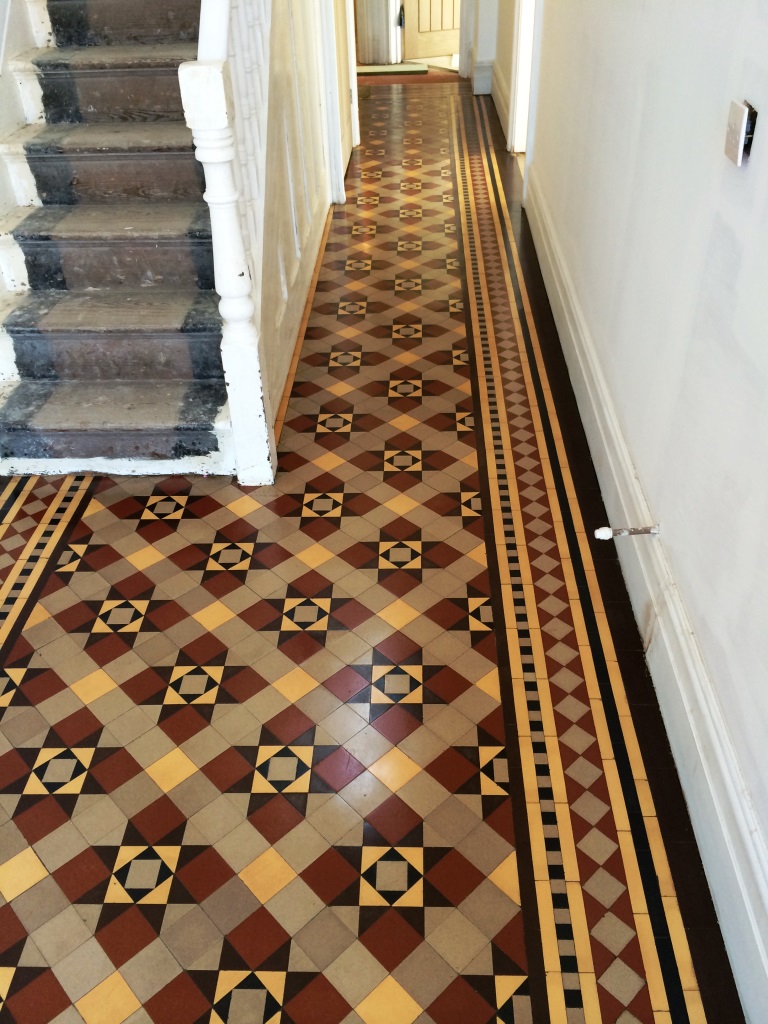
Upon our return we tested the floor was dry with a damp meter, testing in a number of locations. The readings were fine so we proceeded to seal the floor using six coats of Tile Doctor Seal and Go which will protect the floor from further dirt build-up and staining, it also adds a nice subtle sheen to the tiles.

Original Victorian Tiles Melksham After Cleaning and Sealing
All went well with no major problems and as you can see the tiles now look fantastic.

Putting the life back into an original Victorian tiled floor in Melksham

Original Victorian Tiled Hallway in Melksham Read More »

Honed Limestone After Cleaning and Sealing in Marlborough

Honed Limestone Tiled Floor Cleaned and Sealed in Marlborough

The photographs below of a Honed Limestone tiles fitted in the living room of a house in Marlborough. The tiles were proving difficult to keep clean especially around the high traffic areas such as the doorway, I suspect the sealer had worn down and dirt was now becoming ingrained in the pores of the stone.

Honed Limestone Before Cleaning in Marlborough

Cleaning Limestone Floor Tiles

The first job was to remove any surface dirt and get the grout clean so a strong dilution of Tile Doctor Pro-Clean was mopped onto the floor and left to dwell for around ten minutes before being scrubbed into the tile and grout lines with a stiff brush. We then removed the dirty cleaning solution with a wet vacuum and rinsed the floor with clean water.

The next step was to burnish the Limestone tiles using a set of diamond burnishing pads starting with the coarse or number 1 pad as it’s known. This is run over the stone in conjunction with a little water and is designed to remove old sealers and other surface coatings and clean at the same time. The resultant milky slurry is the removed using a wet vacuum and the floor rinsed before repeating the whole process with the medium (number 2) pad and fine grade (number 3) pad. The Limestone tiles were then given a final rinse and left to dry overnight. I should point out the Limestone was honed as opposed to polished so there was no need to apply the final pad which is used to bring up the polish on stone.

Sealing Limestone Floor Tiles

I returned the next day to seal the floor checking first that it was dry by taking multiple readings with a damp meter. The result were fine so I was able to move quickly onto sealing the floor for which I used two coats of Tile Doctor Colour Grow which is a versatile impregnating sealer that occupies the pores in the stone preventing contaminates from lodging there and enhancing the colours in natural stone.

Honed Limestone After Cleaning and Sealing in Marlborough
 

Limestone Floor Burnished, Buffed and Sealed in Wiltshire

Honed Limestone Tiled Floor Cleaned and Sealed in Marlborough Read More »

Terracotta Tiled Floor Burbage After Sealing

Deep Cleaning a Terracotta Kitchen Floor in Burbage

Some great photo’s below of Terracotta tiled floor in the kitchen of a house in Burbage which as you can see was overdue for a deep clean and seal.

Terracotta Tiled Floor Burbage Before Cleaning

Terracotta Tile Cleaning

The first job was to get the floor clean so it was covered in a strong dilution of Tile Doctor Pro-Clean which was left it to dwell and soak into the surface for about twenty minutes, this helps to soften and beak down any existing sealer and ingrained dirt and grime. The grout lines were then scrubbed clean with a stiff grout brush which was run along the grout lines before running a rotary floor machine fitted with a black scrubbing pad over the tiles several times to get them clean. Once satisfied with the condition of the floor the remaining soiled cleaning solution was removed using a wet vacuum and the floor rinsed several times with clean water with the aid of a deck brush due to ensure we had flushed out all the dirt from the Terracotta tiles which are quite porous. Once we 100% satisfied that all traces of cleaning product had been removed the floor was left to dry for seven due so we could be sure the Terracotta would be dry on our return.

Terracotta Tiled Floor Burbage After Cleaning

Terracotta Tile Sealing

Upon our return we tested that the floor was dry enough to seal; Terracotta is very porous so it can take a while. Seven days had proved to be plenty of time and the test came back as fine so we sealed the floor first using a single coat of Tile Doctor Colour Grow which is an impregnating sealer that occupies the pores in the stone and also enhances natural colouring and the secondly with five coats of Tile Doctor Seal and Go which adds a nice subtle sheen to the floor.”

Terracotta Tiled Floor Burbage After Sealing
 

Terracotta Floor Deep Cleaned and Sealed in Burbage

Deep Cleaning a Terracotta Kitchen Floor in Burbage Read More »

Cleaning and Sealing Quarry Tiles in Brinkworth Sealed

Quarry tiled floor Deep Cleaned in Brinkworth

This house in Brinkworth was once a pub so as you can imagine the quarry tiled floor has certainly seen some foot traffic and abuse over the years. The owner contacted us to see if they were able to keep it as a feature entrance hall so we carried out a test which went very well and they booked us to do the work straight away.

Cleaning and Sealing Quarry Tiles in Brinkworth Before

Cleaning Quarry Tiles

Due to the level of ingrained dirt we started by covering the floor in Tile Doctor Remove & Go which is a very strong product usually reserved for removing coatings such as sealers from tile. We let it dwell for 10-15 minutes before working it in with a black scrubbing pad attached to a rotary machine; we scrubbed the area making sure that we covered it thoroughly. At this point It became apparent that there were many pitted areas with ingrained dirt so the process was repeated using a nylon scrub brush attached to the rotary machine to help get into all the pitted tiles. We then went round scraping any adhesives, paint or existing seal with a Stanley scraper.

Once we were happy with the result we then removed the slurry with a wet vacuum and rinsed with cold clean water several times with the aid of a deck brush to make sure ALL trace of cleaning product was removed. This process took most of the day and made a significant improvement to the state of the floor which was still quite damp at this stage so we left for the evening agreeing to come back in three days’ time to give the floor sufficient time to dry.

Cleaning and Sealing Quarry Tiles in Brinkworth Cleaned

Sealing Quarry Tiles

Upon our return we used a damp meter in several areas to check the floor had dried, most sealers won’t take to a damp floor and you can get unexpected results so it’s important to check first. The test results were fine so we started sealing the floor using Tile Doctor Seal and Go which is a water based sealer that doesn’t give off a smell whilst its drying, it also adds a subtle sheen to the tile and enhance the look of the floor as well as protecting the tile from future staining.

Cleaning and Sealing Quarry Tiles in Brinkworth Sealed
 

Old Quarry tiled floor deep cleaned in old Wiltshire

Quarry tiled floor Deep Cleaned in Brinkworth Read More »

Black Limestone Tiles Fovant Before and After Sealing

Changing the Appearance of Black Limestone Tiles in Fovant

A customer in Fovant, Salisbury got in touch to clean and seal her Black Limestone tiled floor as she wasn’t happy with appearance. She informed me that when they were laid they were a grey colour which she loved but when the tiler sealed them they became jet black in appearance. The sealer obviously didn’t meet her expectations so I conducted a test to see whether I could remedy the situation and she quickly booked me in.

Black Limestone Tiles Fovant Before Cleaning

Cleaning and Stripping the Sealer from Black Limestone Tiles

First I used a mild solution of Tile Doctor Pro-Clean which was brushed over the floor and left to dwell for ten minutes. Next using a grout brush I scrubbed out all the dirt from the grout lines and removed the now dirty cleaning solution using a wet vacuum rinsing thoroughly afterwards with clean water.

The floor was now ready to be burnished using a series of diamond encrusted pads which would remove the sealer and bring up the polish on the stone. Starting with the coarse pad attached to a rotary machine and some water I began to cover the area turning the water into white slurry. Once I had passed each tile four times I would then remove the slurry with a wet vacuum and rinse thoroughly with clean water. The process was then repeated with the medium and then fine burnishing pads. Once the floor had been rinsed sufficiently I left to dry for an hour or so before using the last very fine diamond pad to buff the tile to a shine and then left the floor to dry overnight.

Black Limestone Tiles Fovant After Cleaning

Sealing Travertine and Limestone Tiles

I returned the next day and started by conducting a damp test in multiple areas to check the stone was ready for sealing. The test results were fine so I continued by applying two coats of Tile Doctor Colour Grow which is an impregnating sealer which will protect from stains and it also brings out the natural colours in the stone. My customer obviously wanted me to keep the tile looking grey so I didn’t use any Stone Oil to darken the tile in this instance.

It’s probably difficult to appreciate from the photographs but my customer was very happy indeed and the tiles now have the desired look.

Black Limestone Tiles Fovant After Sealing
 

Black Limestone Tiles Cleaned, Burnished and Sealed in Wiltshire

Changing the Appearance of Black Limestone Tiles in Fovant Read More »

Limestone Floor Restored in Nunton Before and After

Limestone and Travertine Floor Restored in Nunton

The owner of this house in Nunton near Salisbury got in touch to take a look at the grout lines on their Travertine and Limestone tiled floors which were becoming increasingly dirty and the tiles has started to take on dirt also. We offer a free no obligation survey so I went along to take a look and whilst there did a test clean which worked out really well so they booked us in straight away.

Limestone Floor Restored in Nunton Before Limestone Floor Restored in Nunton Before

Cleaning Travertine and Limestone Tiles

We started by applying a mild dilution of Tile Doctor Pro-Clean which was spread over the floor with particular attention paid to getting the solution into the grout lines. The solution was left to dwell for 10 minutes in order for it to soak in and eat through any dirt and existing sealer; we then used a stiff grout brush to scrub each and every grout line. Next we removed any trace of product by using a wet vacuum and rinsing thoroughly with clean water.

Our next step was to use our diamond encrusted burnishing pads which attach to a rotary machine and burnish the floor with four different grits from coarse to super fine. First using course pad number 1 we put some clean water on the floor and using our rotary machine slowly burnished the area making sure that we passed over each tile 4 times, this coarse pad cuts into the surface grime of the floor and also removes sealers. The resultant slurry is rinsed away with clean water which in turn is removed using a wet vacuum. This process is then repeated with the remaining pads, rinsing between each pad until a nice polish is built up on the tile. The floor is then given a final rinse and once we were satisfied that all the slurry had been removed we left the floor to dry overnight.

Cleaning Travertine and Limestone Tiles

Upon our return we first completed a damp test using a damp meter to make sure the floor had dried sufficiently for sealing. The floor was fine so we started by polishing the surface using a green polishing pad attached to a rotary machine. We then sealed the floor using single coat of Tile Doctor Colour Grow which is an impregnating sealer that will occupy the pores in the stone to prevent other contaminates getting in there, Colour Grow also brings out the colours in the stone especially the browns in Travertine. Once the sealer had dried a white buffing pad was attached to the rotary machine and the floor buffed to a nice shine.

Limestone-Floor-Restored-in-Nunton-After Limestone Floor Restored in Nunton After


Limestone and Travertine Floors Burnished, Buffed and Sealed in Wiltshire

Limestone and Travertine Floor Restored in Nunton Read More »

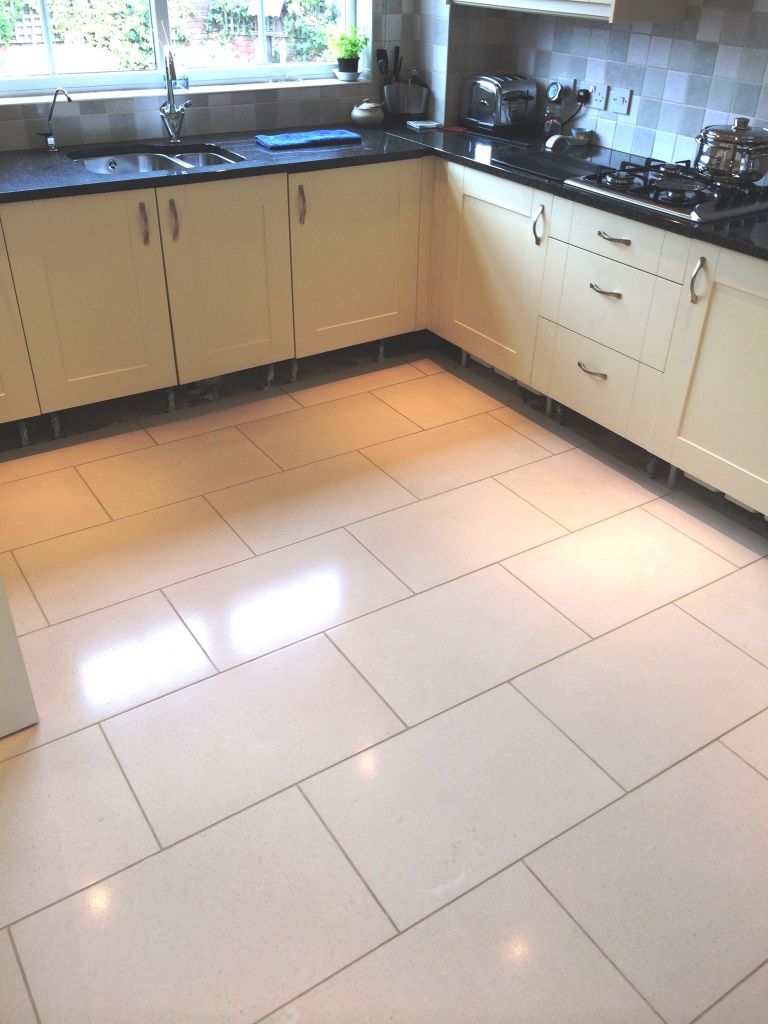
Porcelain Tile Salisbury Before and After Cleaning

Deep Cleaning Textured Porcelain Tiles in a Salisbury

The owner of this Porcelain tiled floor installed in a house in Salisbury had contacted us to look at the grout lines which had become very dark with ingrained dirt and also the textured parts of the tile which had trapped dirt and become difficult to clean effectively. We popped round to take a look and ran a small cleaning demonstration which was very successful and so they quickly booked us to complete the work.

Textured Ceramic and Porcelain tiles tend to have a rough surface which does give them more grip but it also means there are more places for dirt to become trapped, also many don’t realise but the cementitious nature of grout means the very top layer is slightly porous and also able to trap dirt.

Porcelain Tile Salisbury Before Cleaning Porcelain Tile Salisbury Before Cleaning

Deep Cleaning Porcelain Tile and Grout

We started by mixing a strong solution of Pro-Clean and NanoTech Ultra Clean and left to dwell for 10 minutes to allow the mixture to penetrate the build-up of ingrained dirt and grime. Then using a stiff grout brush we scrubbed each and every grout line to remove all traces of dirt and residue.

Next we attached a stiff poly brush to our rotary machine and covered the whole floor making sure that we scrubbed each tile at least four times to make sure we removed as much dirt and grime as possible. We then rinsed the floor several times using clean water and removing slurry with wet vacuum making sure that all product had been removed.

Porcelain Tile Salisbury After Cleaning Porcelain Tile Salisbury After Cleaning

The tile and grout now look much cleaner and hopefully you can appreciate the difference in the photographs above.

Restoring a Textured Porcelain Tiles in Salisbury

Deep Cleaning Textured Porcelain Tiles in a Salisbury Read More »

Terracotta Tiles in East Tytherley Before and After Sealing

Deep Cleaning Terracotta Kitchen Tiles in East Tytherley

I was contacted by the owner of a Terracotta floor at a house in the old village of East Tytherley near Salisbury, the floor was in good condition and was just in need of a regular deep clean and seal with extra attention along the grout lines which had darkened, additionally there appeared to be evidence of efflorescence that would need attention.

Terracotta Tiles in East Tytherley Before Cleaning

Terracotta Tile Cleaning

We started by smothering the floor with a strong solution of Tile Doctor Pro-Clean mixed 50/50 with Nanotech Ultra Clean leaving it to soak into the tiles for twenty minutes to give it time to eat through any dirt and remaining seal.

The solution was scrubbed into the grout using a stiff grout brush followed by the use of a black scrubbing pad fitted to a rotary machine. We made sure each tile was scrubbed in this manner four times to remove all the dirt and remaining sealant. Then we removed all trace of slurry and product by using clean water and a deck brush several times using a wet vacuum to remove the water.

To treat the efflorescence we then applied a dilution of Tile Doctor Grout Clean-up to the affected parts of the floor and used a stiff deck brush to remove the salts again rinsing the floor with clean water afterwards and removing it with a wet vacuum. We then left the floor to dry for ten days as Terracotta is very porous and can take time to dry.

Terracotta Tiles in East Tytherley After Cleaning

Terracotta Tile Sealing

When I returned ten days later the first thing was to test the floor with a damp meter which confirmed the floor was dry and good to seal which was done using ten coats of Tile Doctor Seal and Go which will protect the tile from stains going forward and also adds a nice subtle sheen to the terracotta.

Terracotta Tiles in East Tytherley After Sealing
 

Terracotta Floor Deep Cleaned and Sealed in East Tytherley

Deep Cleaning Terracotta Kitchen Tiles in East Tytherley Read More »

Quarry Tiles Swindon Before and After Cleaning

Quarry tiled floor hidden under Ceramic tiles restored in Swindon

The history of this Quarry Tiled floor at a house in Swindon is a little unusual in that the owner had discovered the Quarry tiles underneath cracked ceramic tiles which had been laid over the top for several years. The customer wanted to bring the Quarry tile back to life to match the existing hallway from the kitchen and so we got a call. Incidentally the practice of laying new tiles on top of old is not unusual as an existing tiled floor provides an ideal level on which to lay new tiles.

Quarry Tiles Swindon Before Cleaning Quarry Tiles Swindon Before Cleaning

Cleaning Quarry Tiles

We started by using a floor scraper to scrape off as much tile adhesive as possible. Once this was done we mixed a strong dilution of Tile Doctor Grout Clean-Up and brushed it all over the remaining tile adhesive and used a black scrubbing pad attached to a rotary machine to remove the glue. This took several attempts using more Grout Clean-up, a floor scraper and a black scrubbing pad to remove all traces of the adhesive. Next we rinsed off any trace of product using clean water and then removed it using a wet vacuum.

The floor was free of glue at this point but we still needed to remove any existing sealer from the tiles and give them a deep clean to remove ingrained dirt so a strong solution of Tile Doctor Pro-clean mixed 50/50 with Nanotech Ultraclean was applied to the tiles and left to dwell for twenty minutes. (The Nanotech product adds tiny abrasive particles to the mix making a more effective cleaner). The solution was worked into the tile using a black pad attached to a rotary machine and the floor thoroughly scrubbed. Once satisfied the tiles were rinsed with clean water several times to remove any trace of cleaning product and the water removed using a wet vacuum. A lot of work had gone into the floor at this point and it needed time to dry before sealing so we left for the evening.

Sealing Quarry Tiles

We returned two days later and after testing the tiles were dry using a damp tester, which came back as OK, we processed to seal the Quarry tiles using six coats of Tile Doctor Seal and Go which is an ideal sealer for Quarry tiles as it adds a nice sheen to the floor as well as providing future surface protection. Seal and Go is also water based so there’s no smell as it dries.

Quarry Tiles Swindon After Cleaning Quarry Tiles Swindon After Cleaning


Wiltshire Quarry tiled floor restoration

Quarry tiled floor hidden under Ceramic tiles restored in Swindon Read More »

Limestone Floor Tiles In Pewsey Before and After

Polishing Limestone Kitchen Tiles in Pewsey

We recently worked on a Limestone tiled floor in the kitchen of a house in the picturesque village of Pewsey. The Limestone floor tiles were in good condition but had lost their shine and lustre and the grout had some staining.

Limestone Floor Tiles In Pewsey Before

Cleaning Limestone Floor Tiles

We started by cleaning the grout using a strong dilution of Tile Doctor Pro-Clean which was left to dwell on the floor for around ten minutes before being scrubbed it into the grout lines with a stiff grout brush. We then removed the dirty cleaning solution with a wet vacuum and rinsed the floor with clean water to remove any surplus product.

The next step was to burnish the Limestone tiles using a set of diamond burnishing pads. You start with pad number 1 in conjunction with a little water, the number 1 pad is a coarse pad designed to remove old sealers and other surface coatings and clean at the same time. Once the clean water turned a milky consistency it was removed using a wet vacuum and the floor rinsed. We carried on the same process with the next 2 step pads which are medium and fine grade pads and then gave a final rinse to remove any slurry produced.

Sealing Limestone Floor Tiles

We left the tiles to dry overnight and returned the next day to finish the floor first confirming it was dry by taking multiple readings using a damp meter. The result was positive so we dry buffed the floor using a Green buffing pad fitted to a rotary machine to shine the surface. Next step was to apply two coats of Tile Doctor Colour Grow with a smooth paint pad leaving it to dry before further buffing the floor with a white pad to bring up the shine. Colour Grow is a versatile sealing product that is designed to bring out the colours in natural stone whilst providing lasting stain protection.

Limestone Floor Tiles In Pewsey After
 

Limestone Floor Burnished, Buffed and Sealed in Wiltshire

Polishing Limestone Kitchen Tiles in Pewsey Read More »

Victorian Tiled Floor Restoration in Holt Before and After

Victorian Tiled Hallway Floor Restored in Holt

The owner of this house located in the village of Holt had discovered a beautiful Victorian Tiled floor hidden underneath their hallway carpet and made contact with us to get it restored and brought back to life.

Victorian Tiled Floor Restoration in Holt Before

Cleaning a Victorian Tiled Floor

We started by making a strong dilution of Tile Doctor Pro-Clean mixed 50/50 with Nanotech Ultraclean which was applied to the floor and left to soak in to eat through the dirt, dust and marks left behind from the carpet and underlay. Once we let the solution dwell for twenty minutes we attached a black scrubbing pad to a rotary machine and worked the cleaning solution into the tile to remove the dirt and any old sealer that may have been present, then once the cleaning solution became was very dirty it was removed using a wet vacuum.

The cleaning process revealed that there were paint splatters all around the wall edges where decorating had previous taken place and there was also evidence of carpet adhesive remaining on the tile. To remove this a solution of Tile Doctor Remove & Go was applied to the stubborn areas and left to dwell for ten minutes before being agitated with a stiff deck brush and a floor scraper. Once the edges were to a satisfactory level we then rinsed the area several times with fresh water to ensure any trace of cleaning product had been removed before sealing again using a wet vacuum to remove the water and also to dry the floor as much as possible before leaving for the evening.

Sealing a Victorian Floor Sealing

Upon our return the next day we did a damp test to make sure the floor was ready to be sealed. The test was positive so we then sealed the Victorian tiles with five coats of Seal & Go which both protects the floor against spills and traffic but also enhances the colours of each tile.

Victorian Tiled Floor Restoration in Holt After
 

Victorian Tiled Hallway Restoration in Wiltshire

Victorian Tiled Hallway Floor Restored in Holt Read More »

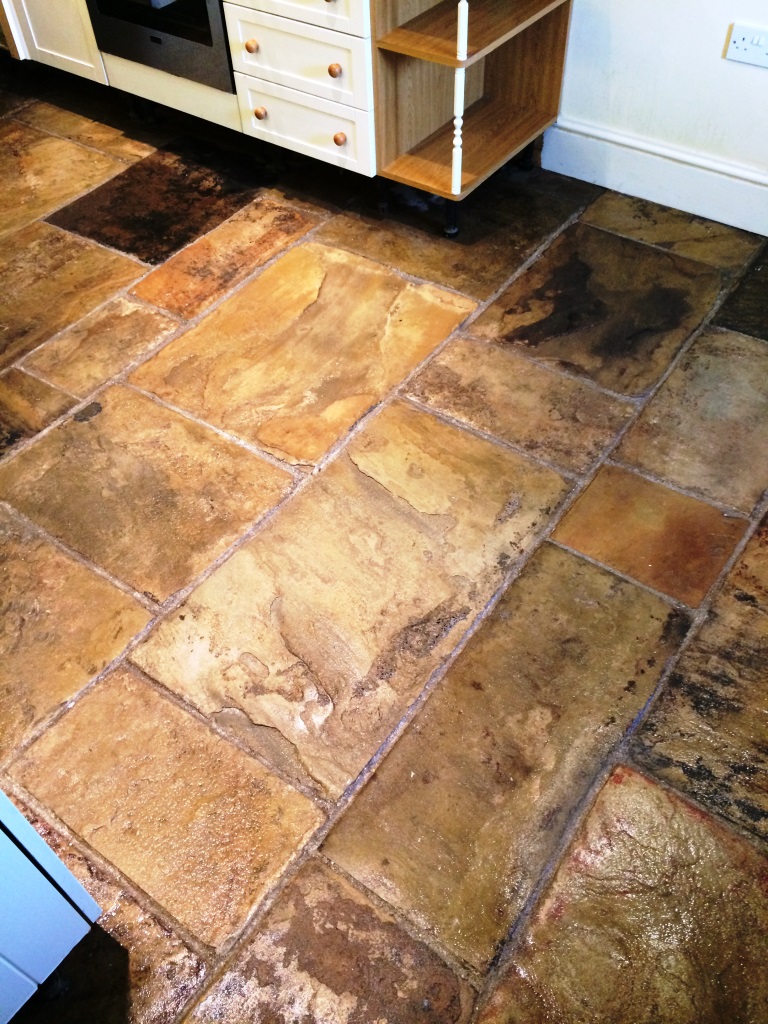
Cleaning Yorkstone Flagstone Floor in Devizes Before and After

Yorkstone Flagstone Tile Floor Deep Cleaned and Sealed in Devizes

The photographs below are from a Yorkstone flagged floor at a house in the market town of Devizes in Wiltshire. The customer had contacted me as the floor was quite dirty and was overdue for a deep clean.

Cleaning Yorkstone Flagstone Floor in Devizes Before

Cleaning Yorkstone Paving Flags

The floor was quite dirty so I started by making a strong dilution of Tile Doctor Pro-clean mixed 50/50 with NanoTech Ultraclean to add more abrasive power; the solution was spread liberally all over the floor and was left to soak into the stone for a good ten to fifteen minutes. Next using a strong poly brush attached to a rotary machine I scrubbed to floor to bring out all the dirt trapped in the riven areas. Next I attached a black scrubbing pad to give the floor an extra aggressive clean.

I then used a wet vacuum to remove the by now very dirty cleaning solution and then rinsed the floor tiles using clean water and a stiff deck brush several times to ensure that all the product and dirt was removed thoroughly.

At this point it became evident that there were several paint blemishes and spots probably from decorating all over the flagstones so I applied Tile Doctor Remove and Go to the affected areas giving it ten minutes to dwell before agitating all the solution with a stiff deck brush and a floor scraper. Once all the paint was removed I then rinsed the floor again several times with clean water and a stiff deck brush to thoroughly remove any product.

Upon completion I advised the customer that it would be beneficial to seal the stone as it would protect it from staining and make it easier to clean however the house was due to be rented out and having little control over what would be used to maintain the floor going forward he was adamant that he only wanted it cleaned.

Cleaning Yorkstone Flagstone Floor in Devizes After
 

Yorkstone Floor Cleaned and Sealed in Wiltshire

Yorkstone Flagstone Tile Floor Deep Cleaned and Sealed in Devizes Read More »

Quarry Tiles in Sherston Before and After Cleaning

Cleaning and Sealing Quarry Tiles in Sherston

I recently paid a free home survey visit to a home owner in the village of Sherston near Malmesbury where the sealer on her Quarry Tiled Floor had started to fail in places and was becoming difficult to keep clean. Whilst I was there I did a sample clean and after reviewing the results she was happy to book us in for the job.

Quarry Tiles in Sherston Before Cleaining

Cleaning Quarry Tiles

To clean the Tiles and strip off the remaining sealer we used a strong dilution of Tile Doctor Pro-clean mixed 50/50 with Nanotech Ultraclean, the Nanotech product adds tiny abrasive particles to the mix making it a more effective cleaning product. This was left to dwell on the floor for twenty minutes before being worked into the tile using and black buffer pad fitted to a rotary buffing machine. The whole area was cleaned in this manner along with a stiff hand brush to get into the grout lines and a wet vacuum which was used to suck up the dirty residue before the floor was rinsed down with cold water.

Once the floor had started to dry it had become apparent that there was still some seal left behind. To resolve this problem I used Tile Doctor Remove and Go which is a powerful coatings remover product. It was left to dwell on the Quarry tiles for ten minutes before being scrubbed in with both a deck brush and black pad. I was still having problems removing all the seal so I then used a steamer with Remove and Go and a stiff deck brush to remove the last of the evident seal. The floor was then thoroughly rinsed the floor several times with clean water to remove any product build up and the ware removed using the wet vacuum.

Sealing Quarry Tiles

The floor was left to dry for a couple of days and then I returned to seal the floor first testing it was dry with a damp meter. The floor was fully dry we applied multiple coats of Tile Doctor Seal and Go which will protect the floor from stains going forward making it easier to clean and also adds a nice shine to the tile.

Quarry Tiles in Sherston After Cleaining
Before leaving I advised the customer on the use of a Neutral tile cleaner to help prolong the life of the sealer, there are a number of acidic floor cleaning products available which should not be used with stone or sealed floors as the acid will eat into the sealer over time reducing its life.

Restoring the Seal on a Quarry tiled floor near Malmesbury

Cleaning and Sealing Quarry Tiles in Sherston Read More »

Marble Tiled Floor Trowbridge Before and After

Polished Marble Tiled Hallway Floor Cleaned and Polished in Trowbridge

The owner of this polished Marble Tiled hallway at a house in Trowbridge was unhappy with the look of their floor which had become dull and scratched and wanted the floor re-polishing. Apologies in advance for the pictures below on reflection I should have taken some close-up shots so you could see the problem better.

Marble Tiled Floor Trowbridge Before

Cleaning Marble Tile and Grout

The first step first was to give the floor a general clean focusing on the grout lines so I started by mixing a mild dilution of Tile Doctor Pro-Clean which is an alkaline based product that is safe to use on Marble. The solution was brushed around the floor concentrating on getting the product into the grout lines. I left this to dwell for 5-10 minutes before scrubbing with stiff grout brush. Once the grout lines were cleaned the dirty solution was removed with a wet vacuum and the tiles rinsed thoroughly with clean water.

Polishing Marble Tiles

The next step was to burnish the floor using a coarse diamond encrusted pad fitted to a rotary machine. This is used with clean water to remove surface scratches and any sealer that may be present. Once the water has turned to slurry after 4 passes of each tile I would remove with a wet vacuum and rinsed thoroughly.

One that step was completed the process is repeated using the Medium, Find and Superfine polishing pads which in turn will gradually re-polish the surface. Between each pad I would remove the slurry using wet vacuum and rinse thoroughly.

Sealing Polished Marble Tile

The floor surface was now restored but still too wet to seal so I called it a day and returned the next day to seal the tiles. On my return I checked that the surface was dry enough to seal using a damp tester which came back OK. My first job was to add an extra shine to the floor by polishing it further with a green buffing pad. Next I sealed the floor using two coats of Tile Doctor Colour Grow which enhances the colours and also protects against future spills and stains etc. Once the seal had dried sufficiently I used a white buffing pad to give one final polish.

Marble Tiled Floor Trowbridge After
Upon completion I gave the customer some cleaning tips including the use of Tile Doctor Neutral Tile Cleaner to prolong the life of the sealer; unlike acid based sealers it won’t damage the sealer every time you clean the floor.

Cleaning and Polishing a Marble Tiled floor in Wiltshire

Polished Marble Tiled Hallway Floor Cleaned and Polished in Trowbridge Read More »

Terracotta Tiled Floor Salisbury Before and After Cleaning and Sealing

Deep Cleaning Terracotta Kitchen Tiles in Salisbury

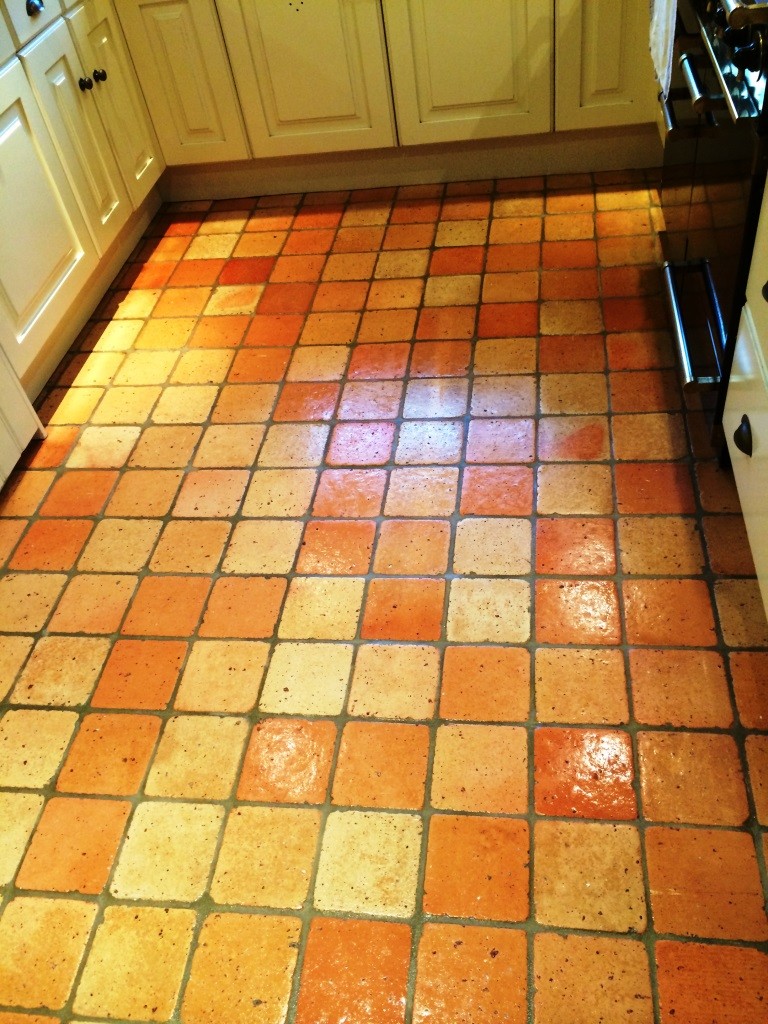
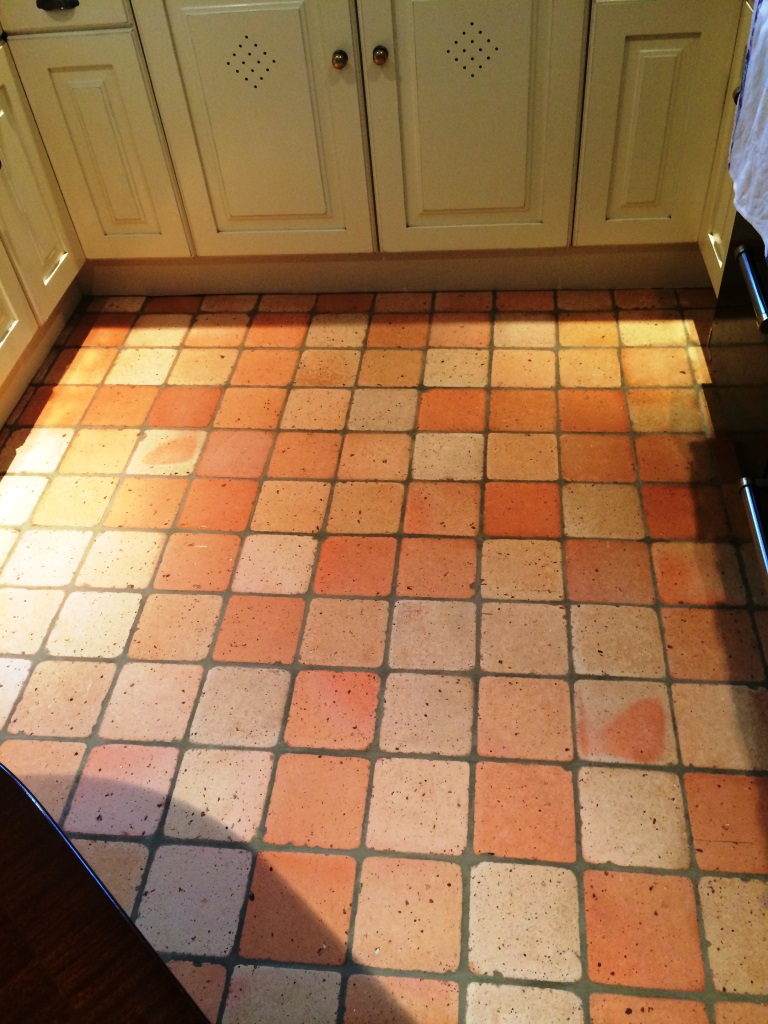
This customer in Salisbury was having difficulty bringing their Terracotta tiled
kitchen floor
back to the condition it was in when it was first laid. Upon
inspection it was evident that the sealer on the floor had failed and dirt had become
ingrained into the pores of the tile making it difficult to clean and causing it to
become increasingly dirty over a period of time.

Terracotta Tiled Floor Salisbury Before Cleaning

Terracotta Tile Cleaning

We started by cleaning the floor with a strong solution of Tile Doctor Pro-Clean
mixed 50/50 with Nanotech Ultra Clean which has the effect of adding tiny abrasive
particles to an already effective alkaline cleaning product that is safe to use on Tile,
Stone and Grout. The solution was scrubbed into the grout first using a stiff grout
brush and this powerful combination made the removal of ingrained dirt much
easier to achieve. The next step was to use a black scrubbing pad on a rotary
machine to clean the tiles. Once I was happy with that the tile and grout was clean
the now dirty cleaning solution was removed using a wet vacuum and he floor then
thoroughly rinsed with cold water using a deck brush to make sure that any product
residue was removed. We then repeated the process for any stubborn stains and
give the floor another cold water rinse to finalise the cleaning process again using a
wet vacuum to remove as much water from the floor as possible to reduce drying
times.

Terracotta Tile Sealing

We left the floor to dry for seven days due the porosity of the terracotta. Upon our
return we gave the floor a damp test to confirm that the floor was dry enough to be
sealed. The test confirmed the tiles had dried and so the Terracotta was sealed using
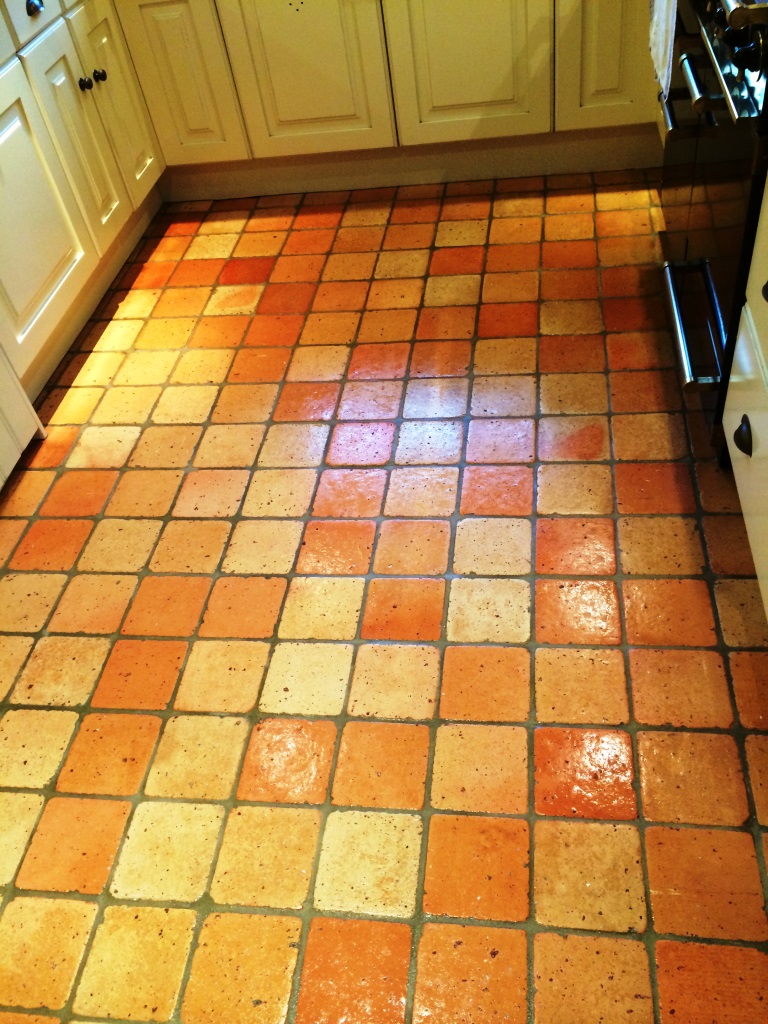
seven coats of Tile Doctor Seal & Go which enhanced the colour and shine on the
floor but most importantly will give the floor the protection it needs.

Terracotta Tiled Floor Salisbury After Cleaning and Sealing
Before leaving I gave the customer some cleaning tips to prolong the life of the seal
and recommended in future they use Tile Doctor Neutral Tile Cleaner to clean the
floor going forward; unlike most acidic tile cleaning products you find in
supermarkets Neutral Clean does not degrade and reduce the life of the sealer with
use.

Terracotta Floor Cleaned and Sealed in Salisbury

Deep Cleaning Terracotta Kitchen Tiles in Salisbury Read More »

Victorian Tiled Floor Chippenham After Cleaning and Sealing

Victorian Tiled Hallway Restoration in Chippenham

This customer had just brought a house in Chippenham which they were renovating and it had come to their attention that Victorian tiles had been laid under the hallway carpet. Keen to restore them the customer called us in to see if we could enhance the appearance of their floor.

Cleaning Victorian Tiles

We started by covering the floor with a mild solution of Tile Doctor Pro-Clean mixed 50/50 with NanoTech Ultra Clean, this combination creates a powerful cleaning solution for tackling ingrained dirt and staining. The solution was left to dwell on the tile for twenty minutes and then scrubbed into the tile using a black pad attached to a rotary machine. This process was quite effective and the cleaning solution turned colour with the dirt as it came off the tile. Once we were happy we had removed all the dirt the now dirty cleaning solution was removed using a wet vacuum and the floor rinsed several times with cold water to remove any trace of cleaning product.

Victorian Tiled Floor Chippenham During Cleaning
With the floor now clean it became evident that there were paint spots along the edges which we removed by applying Tile Doctor Remove & Go this time leaving it to dwell for five to ten minutes before agitating with a stiff deck brush. Once again we used a wet vacuum to remove any product and rinsed the floor using cold water.

Sealing Victorian Tiles

We left the floor to dry overnight and returned the next day to seal the tiles. Upon our return we first used a damp meter to confirm that the floor was dry enough to seal which it was. We then sealed the floor with five coats of Tile Doctor Seal & Go which will protect the floor from staining and make it easy to clean, Seal and Go also adds a nice shine to the tile enhancing the colours and general appearance of the tiles.

Victorian Tiled Floor Chippenham After Cleaning and Sealing Victorian Tiled Floor Chippenham After Cleaning and Sealing

We definitely achieved the customer’s goal to enhance the look of the floor and before leaving we gave them some cleaning tips to prolong the life of the sealer by recommending the use of a Tile Doctor Neutral Tile Cleaner which won’t eat into the sealer like the mildly acidic tile cleaning products that you buy in the supermarket.

Restoring Victorian Tiles in Chippenham

Victorian Tiled Hallway Restoration in Chippenham Read More »

Scroll to Top